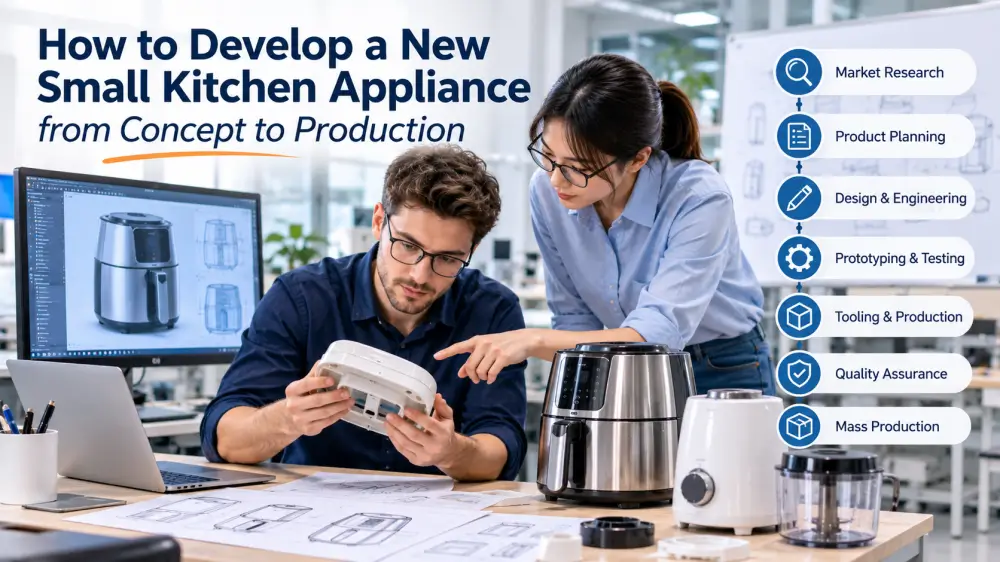
You have an idea for a new kitchen appliance. Perhaps you want to develop a more convenient food chopper, introduce a blender with different functions, or create an air fryer designed for a specific customer group.
The idea may sound promising, but turning it into a product that people can actually use and buy involves many decisions. What features should it have? Which materials are suitable? Can the design be manufactured at a reasonable cost? Will the product meet the requirements of your target market?
These questions need to be addressed before mass production begins.
Developing a new small kitchen appliance usually involves seven stages: market research, product planning, industrial design, engineering evaluation, prototyping, product validation, and production preparation. Each stage helps reduce uncertainty and makes the next investment more informed.
This guide explains how the process works and what brands, importers, and product developers should consider when working with an OEM manufacturer.
What Does Small Kitchen Appliance Product Development Involve?
Small kitchen appliance product development is the process of turning a market opportunity or product idea into a functional, manufacturable product.
It involves more than creating an attractive appearance. A successful product needs to balance several factors:
- Customer needs: Does the product solve a real problem or improve an existing experience?
- Product functionality: Do the selected features work as intended?
- Design and usability: Is the appliance convenient, safe, and easy to operate?
- Technical feasibility: Can the product be engineered using suitable components and materials?
- Manufacturing feasibility: Can it be produced consistently at the expected cost and volume?
- Market requirements: Does it meet the applicable safety, electrical, and material requirements in the countries where it will be sold?
For example, developing a new blender involves decisions about motor performance, jar capacity, blade design, control settings, housing materials, noise, cleaning, and product appearance.
These elements are connected. Changing the jar material may affect product weight and cost. Changing the motor may influence power requirements, internal structure, and thermal performance.
That is why product development should be treated as a coordinated process rather than a series of unrelated design tasks.
7 Steps to Develop a New Small Kitchen Appliance
Step 1 – Identify the Market Need and Product Opportunity
Before designing the product, understand why it should exist.
A common mistake is starting with a list of attractive features without first identifying the customers who will use the appliance and what they actually need.
Begin by researching:
- Your target customer groups
- Existing products in the market
- Competitors’ functions, designs, and price positioning
- Common customer complaints and product limitations
- Potential product differentiation
- Expected retail price and distribution channels
For example, suppose you want to develop a new food chopper.
Market research may show that your target customers care more about easy cleaning, convenient storage, and sufficient bowl capacity than having numerous speed settings. These findings can help you prioritize the product’s design and functions.
Useful research sources include competitor product pages, customer reviews, retailer listings, industry exhibitions, and feedback from distributors or existing customers.
What should you have at the end of this stage?
A clear product opportunity statement explaining:
- Who the product is for
- What problem or need it addresses
- What makes it different from existing options
- Which market or sales channel it targets
You do not need a complete technical design yet. You need a convincing reason to develop the product.
Step 2 – Define Product Requirements and Target Cost
Once the product opportunity is clear, translate it into practical requirements.
A product concept describes what you want to create. A product requirements document (PRD) explains what the finished appliance is expected to do.
For a small kitchen appliance, the requirements may include:
| Requirement Area | Details to Define |
|---|---|
| Product function | Main functions, operating modes, and controls |
| Performance | Capacity, power, speed, temperature, or other relevant parameters |
| Structure | Product dimensions, components, and assembly requirements |
| Materials | Housing, food-contact parts, metal components, and surface finishes |
| User experience | Operation, cleaning, storage, and maintenance |
| Appearance | Shape, color, logo placement, and finish |
| Target market | Intended countries and applicable market requirements |
| Commercial targets | Target retail price, estimated production cost, and order volume |
| Packaging | Product box, accessories, manual, and carton requirements |
Target cost deserves particular attention.
A product may look excellent in a design proposal but become commercially impractical if its components, materials, or manufacturing requirements make the production cost too high.
For example, adding a digital display, additional sensors, or a more complex control system may improve functionality, but it also introduces additional components, engineering work, and testing requirements.
The development team should evaluate these decisions against the product’s market positioning and budget.
What should you have at the end of this stage?
An agreed product brief containing the main functions, technical expectations, target market, estimated cost range, and development priorities.
Step 3 – Develop the Product Concept and Industrial Design
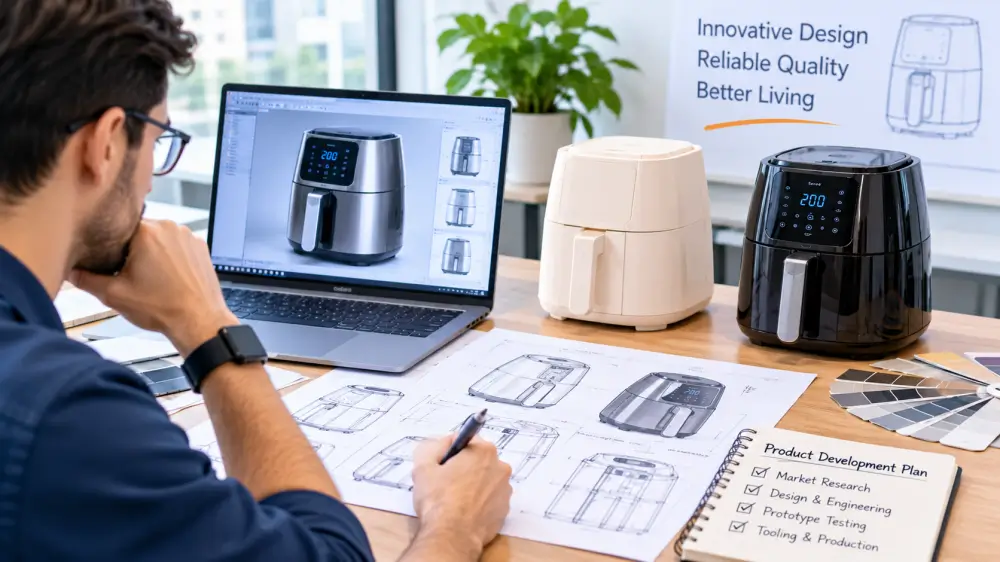
With the product requirements defined, the next step is to develop its appearance, structure, and user experience.
Industrial design determines how the appliance looks and feels, while product engineering considers how its internal components and mechanisms will work.
The design process may include:
- Initial sketches and concept proposals
- Product shape and proportion development
- 2D drawings and 3D modeling
- Control panel and interface design
- Material, color, and finish selection
- Preliminary internal component layout
Consider an electric kettle. Its design needs to account for more than the outer shape. The handle should be comfortable to hold, the lid should open conveniently, the water level should be easy to read, and the base should allow stable placement.
For an air fryer, the design team may need to consider basket access, handle positioning, control visibility, ventilation, and the space required for internal heating components.
The appearance and internal structure should be developed together. A design that looks attractive but leaves insufficient room for important components may require substantial revision later.
What should buyers review?
Before moving forward, review the product’s appearance, dimensions, main structure, control layout, materials, and key user interactions.
It is also useful to confirm which design elements are essential and which can be adjusted to improve manufacturability or control cost.
Step 4 – Evaluate Engineering Feasibility and DFM
A promising design still needs to be technically and commercially feasible.
At this stage, engineers examine whether the proposed product can be developed using suitable components, materials, manufacturing methods, and assembly processes.
One important activity is Design for Manufacturing (DFM).
DFM evaluates a product design from the perspective of actual production. It helps identify potential difficulties before tooling and mass production begin.
For small kitchen appliances, engineering evaluation may cover:
- Internal component arrangement
- Motor, heating, or electrical system selection
- Housing structure and wall thickness
- Plastic and metal material selection
- Assembly methods and fastening points
- Heat dissipation and ventilation
- Product dimensions and manufacturing tolerances
- Mold design and tooling requirements
- Component availability and cost
For example, a blender housing may need to accommodate the motor, control board, wiring, ventilation, and mechanical connections. The structure must also allow the product to be assembled consistently.
A complicated housing design may require more mold components or more difficult assembly operations. Engineers may suggest simplifying the structure without changing the product’s essential appearance or function.
This is also a suitable time to review the expected compliance requirements for the target market. Electrical safety, electromagnetic compatibility, and food-contact material requirements may apply depending on the appliance and its construction.
Why is DFM important?
Identifying design problems before tooling can reduce the need for mold modifications, repeated sampling, and production adjustments.
The goal is not simply to make a product easier to manufacture. It is to find a practical balance between product performance, appearance, quality, and production cost.
Step 5 – Build and Test Prototypes
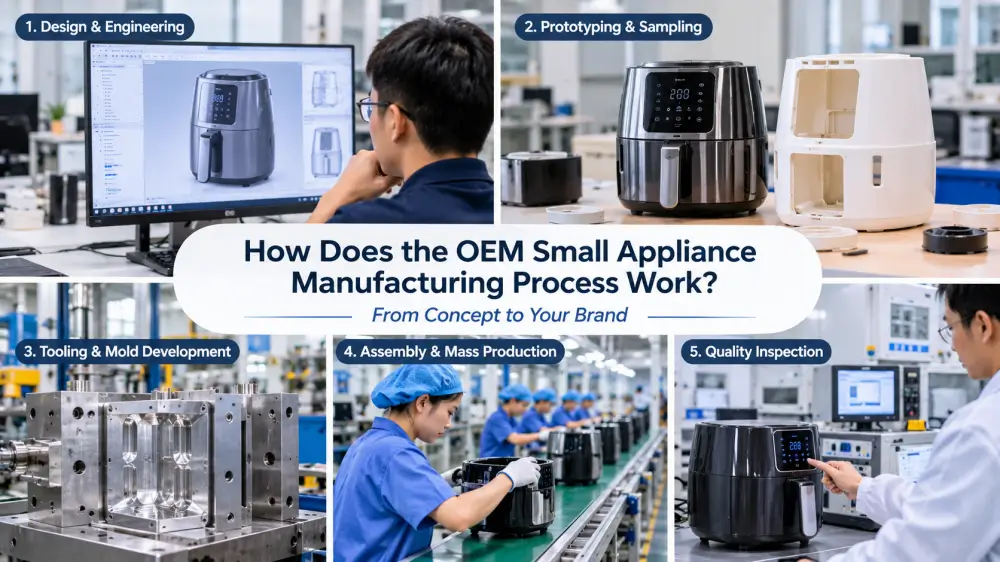
After the initial design and engineering evaluation, prototypes are developed to test whether the product works as intended.
Different prototypes serve different purposes. An appearance model may help evaluate size and shape, while a functional prototype is needed to assess operation and performance.
Depending on the development stage, prototypes may use 3D-printed parts, machined components, modified existing parts, or other suitable methods.
For example, a prototype for a new hand mixer may be used to assess:
- Grip comfort and handling
- Speed control and operation
- Attachment installation and removal
- Motor performance
- Noise and vibration
- Cleaning and maintenance
A food chopper prototype may need to demonstrate that the blades, bowl, lid, and motor system work together as expected.
Testing should be based on the product’s actual requirements. A visual inspection alone cannot confirm that an appliance performs reliably.
It is also important to understand the limitations of early prototypes. A 3D-printed housing may help evaluate shape and component arrangement, but it does not necessarily represent the strength, surface finish, or performance of the final injection-molded part.
What should buyers do during prototype testing?
Evaluate the product against the agreed requirements and provide specific feedback.
Instead of saying that a product needs to be improved, identify the issue: Is the handle uncomfortable? Is the control layout confusing? Does the product vibrate excessively? Is a removable component difficult to clean?
Clear feedback helps the engineering team identify the cause and make appropriate revisions.
Step 6 – Develop Tooling and Validate the Product
Once the product design has reached an agreed level of maturity, custom tooling can be developed where necessary.
For many small kitchen appliances, injection molds are used to manufacture plastic housings, covers, buttons, handles, and other structural components.
The tooling process generally involves:
- Reviewing and approving mold design
- Selecting suitable mold materials
- Machining and assembling the mold
- Conducting initial mold trials
- Inspecting molded parts
- Making adjustments where necessary
Not every project requires new tooling. If an existing product platform or mold can meet the agreed requirements, the development project may involve fewer tooling activities.
After tooling trials, production-intent samples should be evaluated to confirm that the product meets the approved design and technical requirements.
Depending on the product, validation may include:
- Functional and performance testing
- Dimensional and assembly checks
- Material and appearance evaluation
- Temperature-related testing
- Electrical safety testing, where applicable
- Durability and repeated-operation testing
- Cleaning or food-contact evaluations, where relevant
For kitchen appliances, material suitability deserves particular attention because certain components may come into direct contact with food, heat, water, oil, or cleaning agents.
The applicable material and testing requirements depend on the product and destination market. Buyers should confirm these requirements with qualified testing or compliance professionals rather than assuming that one certificate covers every product.
Once the design and validation requirements are satisfied, the buyer and manufacturer can approve the final product configuration and production reference sample.
Step 7 – Prepare for Pilot Production and Mass Production
A product that works as a prototype is not automatically ready for large-scale manufacturing.
Before mass production, the manufacturer needs to confirm that the product can be assembled consistently using the intended production process.
A pilot production run can help evaluate:
- Assembly sequence and work instructions
- Component compatibility
- Production equipment and fixtures
- Operator procedures
- Functional inspection methods
- Product appearance consistency
- Packaging and labeling
- Potential production bottlenecks
For example, a customized air fryer may perform well during prototype testing but reveal assembly difficulties when several units are produced using the actual production line.
A pilot run helps identify these issues before larger quantities are manufactured.
Once the pilot results are reviewed and the necessary adjustments are completed, the project can move into mass production.
At this stage, the manufacturer should work with agreed product specifications, approved samples, component requirements, production procedures, and quality-control checkpoints.
For buyers, it is important to keep communication active during this transition. Any changes to key components, materials, or product specifications should be reviewed and approved before they are introduced into production.
What Should You Consider When Developing a Kitchen Appliance?
Beyond the seven development stages, several product-specific considerations deserve attention.
1. Food-Contact Materials
Many kitchen appliances contain components that come into contact with food, such as blender jars, food processor bowls, mixing attachments, and internal containers.
Material selection should consider the intended use, temperature exposure, cleaning conditions, and applicable food-contact requirements in the target market.
Do not assume that a material is suitable for every food-contact application simply because it is commonly used in kitchen products.
2. Heat and Electrical Safety
Appliances such as air fryers, coffee makers, electric kettles, and toasters generate or use heat.
Their designs need to account for operating temperatures, insulation, ventilation, component protection, and foreseeable use conditions.
The relevant safety standards and conformity assessment requirements depend on the product category and destination market.
These requirements should be identified during product planning rather than after the design is complete.
3. Cleaning and Daily Usability
Kitchen appliances are used frequently and often need regular cleaning.
Consider whether removable parts are easy to detach, whether food residue can collect in difficult-to-reach areas, and whether the materials can withstand the intended cleaning method.
For example, a food processor with complicated removable parts may be less convenient even if it performs its main function well.
4. Manufacturing Cost and Product Complexity
Every additional feature can affect component costs, engineering work, assembly, and quality inspection.
Before adding a feature, consider whether it provides enough value to justify its cost and complexity.
A focused product with reliable core functions may be more commercially suitable than a complicated model with features that target customers rarely use.
How to Choose the Right OEM Development Partner
Choosing an OEM partner is an important decision, especially if your project requires customized design, engineering, or tooling.
Instead of evaluating a manufacturer only by its product catalog or quotation, consider whether it can support the development work your project actually requires.
Here are several points to review:
| Evaluation Area | What to Look For |
|---|---|
| Product experience | Experience with relevant kitchen appliance categories |
| Engineering support | Ability to review product structure, components, and technical requirements |
| Prototyping | A clear process for sample development and revision |
| Tooling capabilities | Experience coordinating mold development and tooling trials |
| Manufacturing resources | Suitable production equipment, assembly processes, and component supply |
| Quality management | Defined inspection procedures and product testing arrangements |
| Communication | Clear project milestones, feedback, and change management |
| Export experience | Familiarity with destination-market requirements and export documentation |
It is also important to clarify the scope of cooperation.
Some manufacturers mainly customize existing products, while others can support more extensive product development. The right choice depends on how much differentiation your project requires.
Before starting, discuss development responsibilities, tooling costs and ownership, sample approval, intellectual property, quality requirements, and production arrangements.
A clear agreement helps both parties understand their responsibilities throughout the project.
Common Mistakes in New Small Kitchen Appliance Development
Even a promising product idea can encounter problems if important decisions are made too late.
Here are four mistakes worth avoiding.
1. Designing before understanding the market
An attractive product does not necessarily have a clear market opportunity. Research your target customers, competitors, and price positioning before investing heavily in development.
2. Adding too many features
More functions can mean more components, higher costs, more complicated controls, and additional testing. Prioritize the features that matter most to your intended customers.
3. Skipping engineering evaluation
A product design needs to be reviewed for structure, materials, assembly, and manufacturing feasibility. Ignoring these factors can lead to costly changes after tooling begins.
4. Treating prototype approval as production approval
An early prototype may demonstrate the main concept, but it does not necessarily prove that the final product can be manufactured consistently. Production-intent samples and appropriate validation are still important.
Frequently Asked Questions
How long does it take to develop a new small kitchen appliance?
There is no universal development timeline. It depends on product complexity, the level of customization, tooling requirements, sample revisions, component availability, and testing requirements.
A customized product based on an existing platform may require fewer development activities than a completely new appliance. Ask the manufacturer for a project-specific schedule with clear milestones.
How much does it cost to develop a new kitchen appliance?
Development costs vary according to the product design, engineering work, prototype requirements, custom tooling, testing, and certification needs.
A project using an existing product platform may require less initial development investment than one involving new structures and molds. Request a breakdown of development, tooling, testing, and production costs before committing to the project.
Do I need a complete product design before contacting an OEM manufacturer?
No. You can approach an OEM manufacturer with an initial concept, reference product, sketches, or a basic product brief.
However, you should be prepared to explain the intended functions, target customers, market, and commercial expectations. The manufacturer can then help assess feasibility and identify the information needed for further development.
What is the difference between a prototype and a production sample?
A prototype is developed to evaluate a product concept, appearance, structure, or function. It may use preliminary materials or manufacturing methods.
A production sample is made closer to the intended mass-production configuration and is used to verify the final design, components, assembly, and quality requirements.
Can an OEM manufacturer help develop a completely new kitchen appliance?
Some OEM manufacturers provide engineering, product design, prototyping, tooling coordination, and manufacturing support. Others focus mainly on customizing existing products.
Confirm the manufacturer’s actual capabilities and responsibilities before choosing a development partner.
Conclusion
Developing a new small kitchen appliance requires more than a good idea. It takes market research, clear product requirements, practical design, engineering evaluation, prototype testing, and careful preparation for manufacturing.
For brands and importers, involving an experienced OEM partner early can help identify technical and production challenges before they become expensive problems.
Have a New Kitchen Appliance Idea?
Kodio supports brands, distributors, and importers with OEM and ODM solutions for small kitchen appliances and other household products. Whether you are exploring a new product concept or looking to customize an existing design, our team can discuss your requirements and potential manufacturing options.