Imagine you have a new blender, air fryer, or electric kettle idea and are ready to bring it to market under your own brand. You have a target selling price, an idea of what the product should look like, and a market waiting for it.
But what happens after you contact an OEM manufacturer?
How does your idea become a finished appliance, and what needs to happen before the first shipment leaves the factory?
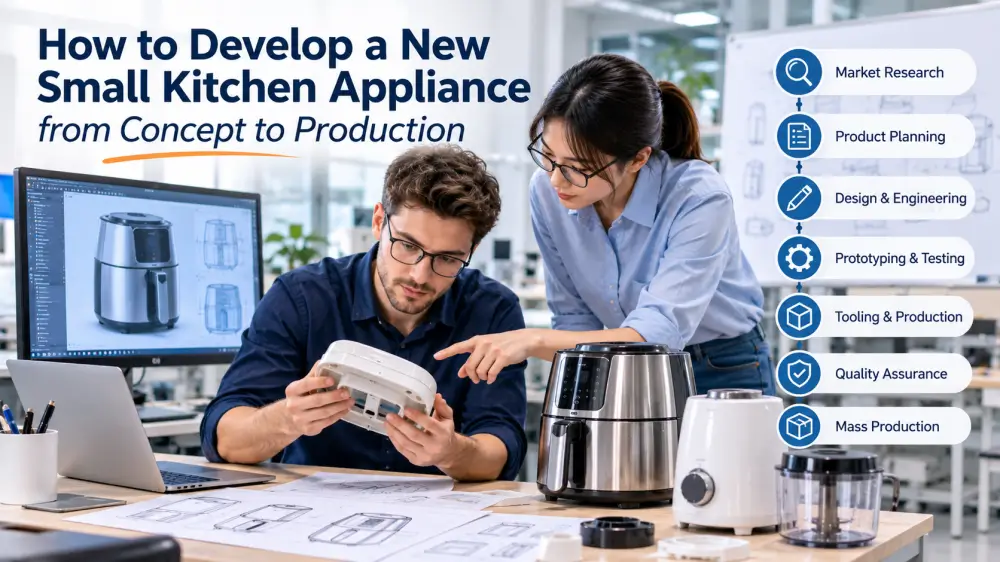
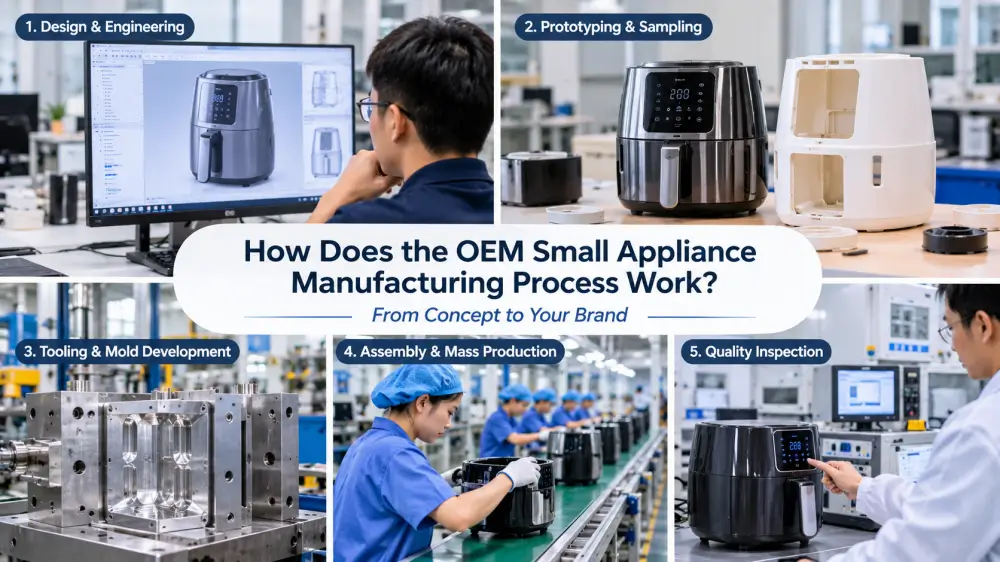
The OEM small appliance manufacturing process involves much more than assembling products on a production line. It usually includes requirement confirmation, product engineering, prototyping, tooling, sample approval, component manufacturing, mass production, quality inspection, and shipment.
Understanding these stages helps brands, importers, and distributors communicate more effectively with manufacturers, plan their budgets, and reduce avoidable delays. Let’s walk through the process step by step.
What Is the OEM Small Appliance Manufacturing Process?
The OEM small appliance manufacturing process is the series of steps a manufacturer follows to develop and produce appliances according to a customer’s agreed product requirements, specifications, and branding needs.
Depending on the project, a manufacturer may handle product engineering, industrial design, mold development, component sourcing, assembly, testing, packaging, and export preparation.
For example, a brand planning to launch a customized blender may need to confirm the motor specifications, jar material, capacity, control settings, housing design, colors, packaging, and target-market requirements before production begins.
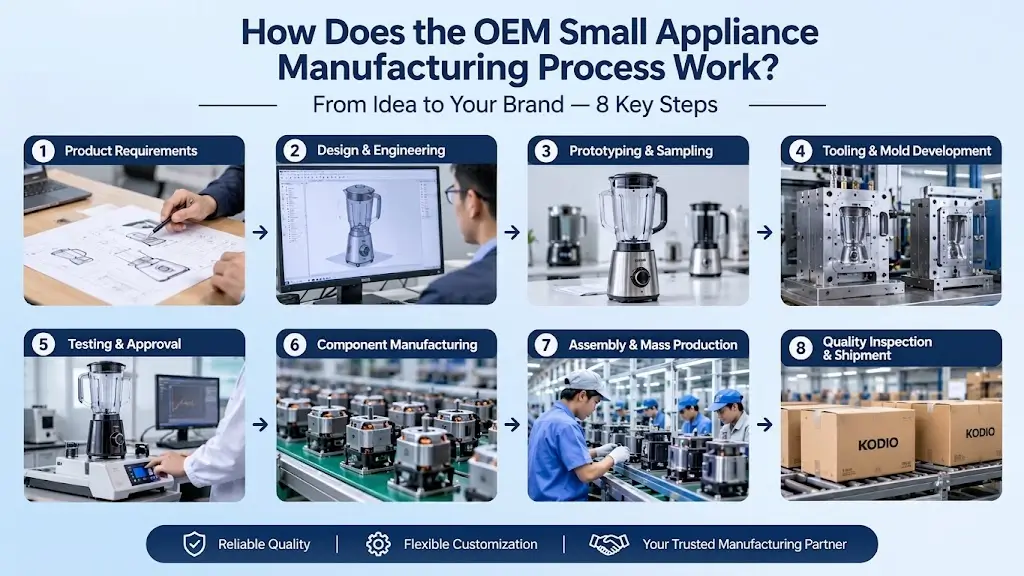
The exact workflow depends on whether the project uses an existing product platform or requires substantial new development. However, most OEM small appliance projects follow eight main stages.
8 Key Steps in the OEM Small Appliance Manufacturing Process
Step 1 – Product Requirements and Project Brief
Every OEM project starts with a clear understanding of what the customer wants to manufacture.
Before discussing tooling or production costs, the brand and manufacturer need to establish the product’s basic requirements. This gives the engineering and production teams a shared reference for the project.
A product brief typically includes:
- Product category and intended application
- Main functions and performance requirements
- Product dimensions and capacity
- Power rating, voltage, and frequency
- Housing and component materials
- Color, finish, and branding requirements
- Target sales market
- Estimated order quantity and target cost
- Packaging, labeling, and documentation requirements
For example, a buyer developing an electric kettle for the European market may need to confirm its capacity, rated power, voltage, plug type, housing material, temperature-control requirements, and packaging language.
These details matter because requirements can affect component selection, engineering decisions, testing, and production costs.
What should buyers prepare?
If you already have product drawings, reference samples, technical specifications, or product images, share them with the manufacturer. If you only have an initial concept, explain the intended functions, target users, market positioning, and expected price range.
The more clearly both parties understand the project, the easier it is to evaluate its feasibility.
Step 2 – Product Design and Engineering Evaluation
Once the initial requirements are confirmed, the project moves into product design and engineering evaluation.
The goal is to turn the product brief into a design that can function properly and be manufactured consistently.
Depending on the project, this stage may involve:
- Industrial design and product appearance development
- 2D engineering drawings and 3D modeling
- Internal component layout
- Electrical and mechanical design
- Material and component selection
- Design for Manufacturing (DFM) review
DFM is particularly important in OEM appliance manufacturing. It evaluates whether a product design can be produced efficiently using available manufacturing processes.
For example, a plastic blender housing may look attractive in a design drawing, but its wall thickness, structure, mold design, and assembly method also need to be considered. Poor design decisions can lead to deformation, difficult assembly, inconsistent appearance, or unnecessary production costs.
The engineering team may recommend adjustments to the structure, materials, or component arrangement before the project moves forward.
What should buyers confirm?
Review the proposed design, technical drawings, major components, materials, and expected product performance. Make sure important requirements are documented rather than relying only on verbal discussions or product images.
Step 3 – Prototyping and Sample Development
After the initial design and engineering review, the manufacturer may develop prototypes or functional samples.
A prototype allows both parties to evaluate the product before committing to full production tooling or larger manufacturing investments.
Depending on the product and development stage, samples may be produced through 3D printing, machining, modified existing components, or preliminary production methods.
For small kitchen appliances, sample evaluation may cover:
- Overall appearance and dimensions
- Product structure and assembly
- Button operation and user experience
- Motor or heating performance
- Temperature control and functional operation
- Noise and vibration
- Material quality and surface finish
Consider a new hand mixer project. A sample can help the buyer check whether the grip feels comfortable, the speed settings work as expected, the attachments fit correctly, and the product performs its intended mixing functions.
This stage is also an opportunity to identify design problems before they become more expensive to correct.
What should buyers confirm?
Provide clear feedback on the sample. If changes are needed, describe the exact issue and expected result. Photos, measurements, marked-up drawings, and written comments can help prevent misunderstandings.
Step 4 – Tooling and Mold Development
If the project requires custom plastic or metal components, tooling development may be one of the most important stages.
Many small appliances use injection-molded plastic housings, covers, buttons, bases, and internal structural parts. Custom molds are developed to produce these components with the required dimensions, appearance, and fit.
The tooling process generally includes:
- Mold design based on approved product drawings
- Mold material selection and machining
- Mold assembly and initial trial
- Trial production of sample components
- Dimensional and appearance inspection
- Mold adjustments where necessary
For example, a customized air fryer may require molds for its outer housing, control panel, handle, and other plastic components.
After the first mold trial, engineers inspect the molded parts for dimensions, surface finish, deformation, fit, and assembly compatibility. If issues are identified, adjustments may be needed before the parts are approved.
Not every OEM project requires new molds. If the manufacturer already has a suitable product platform or existing tooling, the project may need fewer development steps. The actual requirements depend on the agreed customization scope.
What should buyers confirm?
Before approving tooling, clarify the mold specifications, tooling costs, development schedule, maintenance responsibilities, and ownership arrangements. If the tooling is customer-funded, mold ownership and access rights should be clearly stated in the agreement.
Step 5 – Sample Testing and Approval
Once the product design and tooling are sufficiently developed, the manufacturer produces samples for further evaluation.
This is an important decision point because the approved sample becomes a reference for subsequent production.
The buyer and manufacturer should check whether the sample meets the agreed requirements, including:
- Appearance, dimensions, and color
- Product functions and performance
- Material and component specifications
- Assembly quality
- Packaging and accessories
- Applicable safety and compliance requirements
For electrical appliances, testing requirements depend on the product type and destination market. They may include electrical safety, temperature performance, insulation, abnormal operation, mechanical strength, or electromagnetic compatibility testing, where applicable.
It is important to distinguish between internal product checks, third-party laboratory testing, and formal certification. They are not interchangeable, and the appropriate requirements should be identified for the specific product and target market.
Once the sample is approved, both parties should keep a documented reference sample or an agreed approval record. This is often called a golden sample.
The golden sample helps production and quality-control teams understand what the finished product should look and perform like.
What should buyers confirm?
Make sure the approved sample matches the final specification. Record the model revision, materials, components, color, accessories, packaging, and any approved deviations.
Avoid making major changes after sample approval without documenting their impact on tooling, testing, costs, and schedule.
Step 6 – Component Manufacturing and Sourcing
After the product configuration and relevant samples are approved, the manufacturer prepares the components required for production.
Small appliances usually contain multiple parts and materials sourced from different production processes.
Depending on the product, component manufacturing and sourcing may involve:
- Plastic injection molding
- Metal stamping and fabrication
- Motor and heating-element sourcing
- PCB and electronic component sourcing
- Power cords, switches, and connectors
- Glass, stainless steel, or other product materials
- Packaging materials and printed accessories
For example, a blender may require a motor, motor housing, blade assembly, jar, lid, control panel, power cord, and packaging.
The manufacturer needs to coordinate these components so they are available in the correct specifications and quantities when assembly begins.
This stage also requires attention to component consistency. A change in motor supplier, plastic material, electrical component, or other key part may affect product performance or the approved configuration.
What should buyers confirm?
Ask how critical components are specified and controlled. For customized projects, confirm that substitutions require approval, particularly when a component affects product performance, safety, appearance, or compliance.
Step 7 – Assembly and Mass Production
Once the required components are ready, the project can move into assembly and mass production.
The production team follows established work instructions and assembly procedures to turn individual components into finished appliances.
A typical small appliance assembly process may include:
- Component preparation and inspection
- Installation of motors, heating elements, or electrical parts
- Wiring and PCB installation, where applicable
- Housing and structural component assembly
- Functional checks during production
- Final product assembly and appearance inspection
The exact process varies by product category.
For example, assembling a coffee maker involves different components and operations from assembling a hair dryer or electric kettle. Each product needs suitable work instructions, equipment, and testing procedures.
Before full-scale production, some projects benefit from a pilot production run. A pilot run uses the intended production process to check whether the approved product can be manufactured consistently.
It can reveal issues that may not have appeared during prototype development, such as assembly difficulties, component variation, production bottlenecks, or packaging problems.
After the pilot results are reviewed and accepted, the manufacturer can proceed with the agreed mass production plan.
What should buyers confirm?
Discuss the production schedule, order quantity, material availability, production capacity, and inspection arrangements. If the pilot run identifies problems, make sure corrective actions are completed before releasing the full order.
Step 8 – Quality Inspection, Packaging, and Shipment
The final stage is to verify that finished products meet the agreed requirements before delivery.
Quality control should not begin only when products are ready to ship. It should be integrated throughout the manufacturing process.
Common quality-control checkpoints include:
| Inspection Stage | What Is Checked |
|---|---|
| Incoming Quality Control (IQC) | Materials, components, dimensions, and supplier consistency |
| In-Process Quality Control (IPQC) | Assembly operations, workmanship, and production consistency |
| Final Quality Control (FQC) | Product appearance, functions, and agreed performance checks |
| Pre-Shipment Inspection (PSI) | Finished goods, quantity, packaging, labeling, and shipment readiness |
For small electrical appliances, product-specific checks may include power-on testing, functional operation, electrical safety checks, temperature-related checks, and visual inspection, depending on the product and agreed quality plan.
After inspection, approved products are packed according to the agreed packaging specifications.
Packaging preparation may include:
- Product boxes and protective materials
- User manuals and warranty information
- Accessories and spare parts
- Product labels and carton markings
- Shipping cartons and pallet arrangements
Before shipment, buyers should also confirm the packing list, commercial invoice, shipping marks, and other required export documents.
The manufacturer then coordinates the agreed shipping arrangements according to the order terms.
What Should Buyers Prepare Before Starting an OEM Project?
A successful OEM project depends on cooperation between the buyer and manufacturer. Preparing the right information before production starts can make communication more efficient and reduce unnecessary revisions.
Here is a practical checklist for buyers:
| Information to Prepare | Why It Matters |
|---|---|
| Product concept or reference sample | Helps the manufacturer understand the expected product |
| Technical specifications | Defines functions, dimensions, materials, and performance |
| Target market | Helps identify relevant electrical and regulatory requirements |
| Branding requirements | Clarifies logo, colors, packaging, and product appearance |
| Target order quantity | Supports production and material planning |
| Target cost | Helps evaluate design and component options |
| Expected launch schedule | Helps establish project milestones |
| Quality requirements | Defines inspection standards and acceptance criteria |
You do not necessarily need to have every technical detail finalized before contacting a manufacturer. An experienced OEM partner can help review the initial requirements and identify information that still needs confirmation.
However, the major product requirements and commercial expectations should be agreed upon before substantial development or tooling investment begins.
How Long Does the OEM Small Appliance Manufacturing Process Take?
There is no single standard timeline for every OEM small appliance project.
The total development and production time depends on several factors:
- Whether the project uses an existing product design or requires new development
- The complexity of the product structure
- Whether new molds or tooling are needed
- The number of sample revisions
- Component availability
- Testing and certification requirements
- Order quantity and production scheduling
- Packaging customization and shipping arrangements
A project based on an existing product platform with limited customization may require fewer development steps than a completely new appliance with custom engineering and tooling.
It is also important to distinguish between product development time and mass production lead time. They are separate parts of the overall project schedule.
For better planning, ask the manufacturer to provide a milestone-based timeline covering:
- Requirement confirmation
- Engineering and design approval
- Prototype and sample development
- Tooling and mold trials, if required
- Sample testing and final approval
- Component preparation
- Mass production
- Inspection and shipment
Rather than relying on a general delivery estimate, buyers should understand what each milestone depends on and when their approval is required.
Common Mistakes to Avoid in OEM Appliance Manufacturing
Even with an experienced manufacturer, unclear requirements and delayed decisions can create problems during an OEM project.
Here are some common mistakes worth avoiding.
1. Starting with an unclear product specification
A general request such as “we need a high-quality blender” is not enough for accurate engineering or costing. Define the capacity, motor requirements, materials, functions, target market, and other important details as early as possible.
2. Changing the design after tooling begins
Late changes to housing dimensions, structural components, or product appearance can require mold modifications and additional sample evaluations. Review and approve the design carefully before tooling starts.
3. Approving samples without clear criteria
A sample should be evaluated against documented specifications, not simply personal impressions. Record important performance, appearance, and material requirements.
4. Treating certification as a last-minute task
Different markets and appliance categories may have different compliance requirements. Identify the relevant testing and certification route early enough to include it in the development schedule.
5. Focusing only on the unit price
The lowest quotation does not necessarily represent the lowest overall project cost. Tooling, customization, testing, packaging, component quality, and production consistency should also be considered.
6. Ignoring quality control during production
A good-looking sample does not automatically guarantee consistent mass production. Buyers should agree on quality requirements and inspection checkpoints before the order enters production.
Frequently Asked Questions About the OEM Small Appliance Manufacturing Process
1. What are the main steps in OEM small appliance manufacturing?
The main steps usually include product requirement confirmation, design and engineering, prototyping, tooling and mold development, sample approval, component manufacturing, assembly, mass production, quality inspection, packaging, and shipment.
The exact sequence may vary depending on the product and customization requirements.
2. What information does a manufacturer need to start an OEM project?
A manufacturer typically needs the product category, reference design or sample, technical requirements, target market, expected order quantity, target cost, branding preferences, and expected launch schedule.
If some details are not available, the manufacturer can help review the concept and identify the information needed for further development.
3. Does every OEM small appliance project require new molds?
No. If an existing product platform or tooling can meet the customer’s requirements, new molds may not be necessary.
New tooling is more likely to be required when the project involves customized housing structures, dimensions, or other components that cannot be produced using existing molds.
4. What is a golden sample in OEM manufacturing?
A golden sample is an approved reference sample that represents the agreed product configuration, appearance, materials, and performance requirements.
It helps the manufacturer and buyer maintain a consistent reference during mass production and quality inspection.
5. How can buyers maintain product quality during OEM manufacturing?
Buyers should define clear product specifications, approve reference samples, establish inspection criteria, and agree on quality-control checkpoints.
Depending on the product, these may include incoming component inspection, in-process checks, functional testing, final inspection, and pre-shipment inspection.
Conclusion
A successful OEM small appliance project depends on clear requirements, careful development, reliable production, and consistent quality control. Understanding each stage helps buyers work more effectively with manufacturers and avoid unnecessary delays.
Ready to Start Your Next Appliance Project?
Explore Kodio’s product range or tell us what you are looking to develop. Our team is ready to discuss your requirements.